Crocheting a hat can be a fun and rewarding project, perfect for beginners and seasoned crafters alike. Here’s a comprehensive guide to help you crochet your very own hat.
Crocheting a hat is a fantastic way to explore your creativity and make something both practical and stylish. Whether you’re making it for yourself or as a thoughtful gift, it’s a project that allows you to experiment with different stitches, colors, and styles. In this guide, we’ll walk through the step-by-step process of crocheting a hat, covering everything from materials needed to finishing touches.
Materials Needed:
Before diving in, gather the necessary materials:
- Yarn: Choose a yarn weight and color that suits your preference.
- Crochet Hook: Use the hook size recommended for your chosen yarn.
- Scissors
- Yarn Needle
- Measuring Tape
- Stitch Marker (optional)
Steps to Crochet a Hat:
1. Choose the Pattern:
- Select a Pattern: There are various crochet patterns available online or in craft books. Choose one that aligns with your skill level and desired hat style.
2. Gather Your Materials:
- Yarn Choice: Pick a soft yarn that suits the season and your comfort.
- Hook Selection: Match the hook size to the yarn weight for the best results.
3. Gauge and Measurements:
- Gauge Swatch: Create a small sample to ensure your tension matches the pattern.
- Measurements: Determine the circumference and length of the hat you want to make.
4. Start Crocheting:
- Foundation Chain: Begin with a foundation chain based on your hat’s circumference.
- Crochet Stitches: Follow the pattern’s instructions for the type of stitches required (single crochet, double crochet, etc.).
- Increasing or Decreasing: Adjust the number of stitches to shape the hat, increasing for the crown and decreasing for the sides.

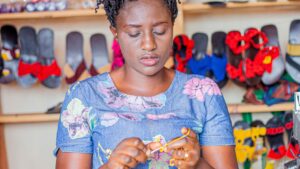
Woman Crocheting in Store with Handmade Shoes
5. Shaping the Hat:
- Crown Shaping: Continue crocheting in the pattern while increasing stitches strategically to form the hat’s crown.
- Hat Body: Work in the established pattern until the hat reaches your desired length.
6. Finishing Touches:
- Closing the Hat: Use slip stitches or sewing to close the hat’s top.
- Fastening Off: Secure the yarn and weave in any loose ends using a yarn needle.
- Blocking (optional): If needed, block the hat to shape it perfectly.
So,…
Crocheting a hat allows you to unleash your creativity while creating something functional and beautiful. Experiment with different yarns, stitches, and patterns to make each hat unique. practice makes perfect, so don’t be discouraged if your first hat isn’t perfect. Enjoy the process, and soon, you’ll have a cozy and stylish hat to wear or share.
External Resources:
- Ravelry’s Hat Crochet Patterns – Explore a vast collection of crochet hat patterns.
- The Spruce Crafts – Crochet Basics – Learn more about crochet basics and techniques.
- LoveCrafts – Choosing the Right Yarn – Helpful tips on choosing the perfect yarn for your projects.
Moving forward
Remember, as you dive into crocheting your hat, feel free to explore and infuse your personal touch into the process.
Let’s dive deeper into the process of crocheting a hat and address some common questions that might arise.
Addressing Common Questions:
1. What are the best yarn and hook sizes for a hat?
- Yarn: Opt for a yarn weight that matches the desired warmth and texture. Worsted weight yarn is a popular choice for hats. As for the hook size, check the yarn label for the recommended hook size and adjust based on your tension and pattern requirements.
2. How do I adjust the hat size for different head circumferences?
- Increasing or Decreasing: Modify the number of initial chains in multiples to accommodate various head sizes. For larger heads, add more chains; for smaller heads, decrease the number of chains.
3. What if I’m new to crocheting? Can I still make a hat?
- Beginner-Friendly Patterns: Look for patterns labeled as beginner-friendly or with detailed instructions. Simple stitches like single crochet or half-double crochet are great for beginners. Start with a basic pattern and gradually tackle more complex ones as you gain confidence.
4. How can I add embellishments or personalize my hat?
- Embellishments: Consider adding pompoms, buttons, ribbons, or crocheted appliqués to personalize your hat. You can also experiment with different color combinations or stitch textures to make it unique.
5. What if I encounter mistakes while crocheting?
- Fixing Mistakes: Don’t worry if you make a mistake; it’s a part of the learning process. For minor errors, like missed stitches, you can often fix them by carefully unraveling a few stitches. For more significant mistakes, you might need to undo a few rows and redo them correctly.
6. How do I care for crocheted hats?
- Washing Instructions: Follow the yarn’s washing instructions. Generally, handwashing in cold water with mild detergent is suitable for most crocheted hats. Lay them flat to dry to maintain their shape.
Conclusion:
Crocheting a hat can be a delightful and fulfilling experience. It’s a wonderful way to showcase your creativity and produce something practical at the same time. Remember, practice and patience are key. Don’t be afraid to explore new patterns, stitches, and techniques to create hats that reflect your unique style.
External Resources:
- Ravelry’s Hat Crochet Patterns – Explore a vast collection of crochet hat patterns.
- The Spruce Crafts – Crochet Basics – Learn more about crochet basics and techniques.
- LoveCrafts – Choosing the Right Yarn – Helpful tips on choosing the perfect yarn for your projects.
Crocheting a hat is not just about the final product; it’s about the journey of creation and the joy of making something handmade.
| Aspect | Crocheting a Hat | Knitting a Hat |
|---|---|---|
| Skill Requirements | Suitable for beginners to advanced crafters. | Suited for those familiar with knitting techniques. |
| Tools Needed | Crochet hook, yarn, scissors, yarn needle. | Knitting needles, yarn, scissors, tapestry needle. |
| Fabric Texture | Typically has a thicker and denser texture. | Can vary from airy to dense based on stitches used. |
| Stitches Used | Involves various crochet stitches (single, double). | Utilizes knit and purl stitches and various patterns. |
| Ease of Shaping | Easier to shape using increases and decreases. | Shaping might require more technique and attention. |
| Portability | Compact and easy to transport crochet supplies. | Knitting needles and yarn might be bulkier to carry. |
| Speed of Work | Generally quicker due to larger crochet hooks. | Might take longer due to smaller knitting needles. |
| Stretchiness | Can have less stretch compared to knitted fabric. | Knitted fabric often has more inherent stretch. |
| Customization | Easy to add embellishments, personalize with ease. | Can include intricate stitch patterns and designs. |
This table highlights key differences between crocheting and knitting a hat, helping you decide which craft might suit your preferences and skill level better.
Final Thoughts:
Crocheting a hat is a wonderful way to explore your creativity, learn new techniques, and produce something both practical and beautiful. Whether you’re a beginner or an experienced crafter, there’s always something new to discover in the world of crocheting. Remember, each hat you create carries a piece of your imagination and craftsmanship.
Key Takeaways:
- Start Simple: Beginners can begin with basic patterns and stitches and gradually move to more complex designs.
- Personalize Your Hats: Add your unique touch through color choices, embellishments, and stitch variations.
- Practice Makes Perfect: Don’t be discouraged by mistakes; they are opportunities to learn and improve your skills.
- Share the Joy: Handmade hats make heartfelt gifts for friends and family.
External Resources:
- Ravelry’s Hat Crochet Patterns – Explore a vast collection of crochet hat patterns.
- The Spruce Crafts – Crochet Basics – Learn more about crochet basics and techniques.
- LoveCrafts – Choosing the Right Yarn – Helpful tips on choosing the perfect yarn for your projects.
Now that you’re equipped with the basics and some helpful tips, grab your yarn, crochet hook, and pattern, and embark on your hat-making journey. Let your imagination soar, and enjoy the rewarding experience of creating something beautiful with your own hands. Happy crocheting!

For over a decade, I’ve been Mike, an artist, crafter, and designer deeply immersed in the Croc world. I thrive on crafting unique, size-inclusive patterns, fostering creativity, and sharing them on ktforum.com. My designs aim to ignite your creative spark and delight you, ensuring clarity and ease of use through rigorous testing. Join me in expressing your creative flair and showcasing your craft with joy.
Related Posts
- Some popular crochet stitches for scarves
Crochet stitches offer a vast array of textures and designs that are perfect for scarves.…
- Do different crochet stitches curl differently
Absolutely, different crochet stitches can behave differently, especially when it comes to curling. Understanding these…
- Organizing Your Crochet Supplies: Storing Hooks and Yarn
Crocheting is not just a hobby; it's a passion that often results in a beautiful…
- Can you crochet a bag or purse
Absolutely. Crafting a crochet bag or purse can be a rewarding and creative project. Here's…

