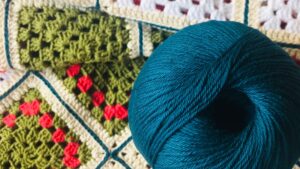
Crocheting a granny square is a delightful and versatile technique that forms the foundation for numerous projects.
Whether you’re a novice or an experienced crocheter, mastering this classic square is both enjoyable and rewarding.
Introduction to Granny Squares
Granny squares are essentially small, square-shaped crochet pieces traditionally made with multiple colors. They serve as building blocks for various items like blankets, bags, and even garments. These squares typically begin from the center and grow outward in rounds.
Materials You’ll Need
To get started, gather these basic materials:
- Yarn: Choose your preferred yarn colors and weight.
- Crochet Hook: Select an appropriate hook size based on your yarn weight.
- Scissors: Essential for cutting yarn.
- Yarn Needle: Helps weave in loose ends.
Step-by-Step Guide
1. Foundation Ring
- Make a Slip Knot: Create a loop by crossing the yarn end over the working yarn and pulling it through.
- Chain Stitches: Chain 4 stitches, join them with a slip stitch to form a ring.
2. Round 1
- Chain Stitches: Begin with 3 chain stitches (acts as the first double crochet).
- Double Crochet (DC): Work 2 DC into the ring, creating a cluster of 3 DC.
- Chain 2: Create a corner space.
- 3 DC Cluster: Work 3 DC into the ring followed by another chain of 2.
- Repeat: Form three more clusters separated by chain-2 spaces. Join with a slip stitch at the starting chain.
3. Rounds 2 and Beyond
- Start a New Color (Optional): Begin a new color by joining it to any corner space.
- Chain 3: This counts as the first DC.
- Cluster in the Same Space: Work 2 DC, chain 2, 3 DC in the same corner space.
- Continue: In each corner space, create a cluster of 3 DC, chain 2, 3 DC. Join with a slip stitch at the starting chain.

4. Repeat and Grow
- Continue: Keep repeating Round 2, adding rounds to increase the square’s size. Alternate colors or maintain a single color scheme based on your design.
5. Fasten Off
- Weave in Ends: Once you’ve reached the desired size, cut the yarn and pull it through the last loop. Use a yarn needle to weave in loose ends neatly.
Tips and Tricks
- Tension Matters: Ensure consistent tension for a uniform square.
- Experiment with Colors: Explore different color combinations for unique designs.
- Practice Patience: Don’t worry if it’s not perfect on your first try; practice makes perfect.
External Resources:
- All About Granny Squares – The Spruce Crafts – An extensive guide on various granny square patterns.
- Crochet Abbreviations – Craft Yarn Council – A list of commonly used crochet abbreviations for beginners.
- Choosing the Right Yarn and Hook Size – Lion Brand Yarn – Tips on selecting the correct yarn and hook size for your project.
So,…
Crocheting a granny square is an enjoyable and fulfilling experience. Start with a simple square and let your creativity flourish as you explore various patterns and color combinations. Remember, practice and patience are the keys to mastering this timeless crochet technique.
Moving forward
let’s continue to delve deeper into perfecting your granny square crochet technique.
Perfecting Your Granny Square Crochet
Refining Your Technique
1. Maintain Consistent Tension
- Practice: Consistency in tension ensures uniformity in your squares. Practice maintaining a steady tension as you crochet.
2. Blocking Your Squares
- Wet Blocking: Once your square is complete, wet it gently, then shape it to the desired size. Allow it to dry flat to ensure it holds its shape.
3. Exploring Pattern Variations
- Solid vs. Openwork: Experiment with solid squares or those with more openwork patterns to achieve different looks.
Troubleshooting Common Issues
1. Ripple Edges
- Too Many Stitches in Corners: Ensure an equal number of stitches in each corner to prevent rippling.
2. Uneven Sides
- Missing Stitches: Count stitches regularly to avoid missing any, which could lead to uneven sides.
3. Twisting Squares
- Joining Rounds Incorrectly: Pay attention while joining rounds to prevent twisting in your squares.
Advanced Techniques and Variations
1. Granny Rectangle
- Modification: Adjust the pattern to create rectangles instead of squares, ideal for scarves or table runners.
2. Continuous Granny Square
- Seamless Joining: Explore techniques for continuously working on multiple squares without cutting yarn between rounds.
3. Overlay Crochet
- Decorative Effects: Learn to overlay crochet to create intricate designs on your squares.
Inspiration and Further Learning
1. Online Communities
- Join Groups: Engage with online crochet communities to gain inspiration, troubleshoot issues, and learn from others’ experiences.
2. Pattern Books
- Explore Books: Invest in pattern books specifically focused on granny squares for a vast array of designs and ideas.
3. Video Tutorials
- Visual Learning: Utilize video tutorials available online for a more comprehensive understanding of the process.
External Resources:
- Granny Square Variations – LoveCrafts – Explore 20 different granny square variations to diversify your projects.
- How to Change Colors in Crochet – Craftsy – Learn seamless color changes to create striking granny squares.
- Advanced Crochet Techniques – The Crochet Crowd – A collection of advanced crochet techniques for seasoned crafters.
Mastering the art of crocheting granny squares opens a world of creativity and possibilities. Embrace the process, learn from mistakes, and explore diverse patterns and techniques to create beautiful, personalized projects.
Enhancing Your Granny Square Mastery
Incorporating Different Stitch Patterns
1. Shell Stitches
- Variation: Experiment with shell stitches to add texture and depth to your squares.
2. Popcorn Stitches
- 3D Effect: Integrate popcorn stitches for a raised, decorative effect on your squares.
Advanced Tips for Precision
1. Using Stitch Markers
- Guiding Stitches: Employ stitch markers to identify corners or specific stitches, aiding in maintaining accuracy.
2. Counting Rows
- Precision: Count rows periodically to ensure all sides of your square are even.
Joining Granny Squares
1. Whip Stitch Method
- Classic Join: Utilize the whip stitch to connect individual squares, creating larger projects like blankets or shawls.
2. Join-As-You-Go Technique
- Seamless Joining: Explore the join-as-you-go method for assembling squares while crocheting the final round.
Complex Patterns and Designs
1. Granny Square Mandalas
- Intricate Designs: Challenge yourself with mandala-inspired granny square patterns for captivating projects.
2. Corner-to-Corner (C2C) Squares
- Diagonal Technique: Experiment with the C2C technique for diagonal squares, adding versatility to your repertoire.
Precision Blocking
1. Steam Blocking
- Professional Finish: Consider steam blocking for a polished, professional look to your squares.
2. Pin Blocking
- Detail-Oriented: Utilize pins to precisely shape your squares during blocking for crisp edges.
External Resources:
- Granny Square Stitch Guide – DMC – Explore various granny square stitch patterns and their step-by-step guides.
- Joining Crochet Squares – Annie’s Catalog – Learn different methods for joining crochet squares to create larger projects.
- Blocking Crochet – The Spruce Crafts – A comprehensive guide to blocking crochet projects for a professional finish.
Conclusion
Advancing your skills in crocheting granny squares opens endless opportunities to create intricate, beautiful, and functional pieces. Experiment with different stitches, joining techniques, and blocking methods to elevate your creations.
Stay curious, keep practicing, and enjoy the journey of crafting exquisite granny squares that showcase your creativity and passion for crochet.
Comparison tabular
Here’s a comparison table summarizing different aspects of crocheting granny squares, from basic techniques to advanced variations:
| Aspect | Basic Technique | Advanced Variation |
|---|---|---|
| Stitch Patterns | Double Crochet clusters | Shell, Popcorn stitches |
| Joining Method | Whip Stitch | Join-As-You-Go Technique |
| Shape Variation | Classic Square | Granny Rectangle, C2C Squares |
| Blocking Technique | Wet Blocking | Steam Blocking, Pin Blocking |
| Precision Tips | Consistent Tension | Stitch Markers, Row Counting |
| Pattern Complexity | Simple repeats | Mandala-inspired designs |
This table provides a quick snapshot comparing fundamental techniques with their more advanced counterparts in crocheting granny squares. Each aspect presents both basic techniques suitable for beginners and advanced variations for seasoned crafters.
Feel free to explore these different aspects based on your skill level and interest in elevating your crochet projects.
Wrapping up
From learning the foundational steps of creating a simple granny square to exploring intricate stitch patterns and advanced techniques, your crochet journey is a testament to your dedication and creativity.
Continuing the Craft
As you continue honing your skills, remember that practice is the key to mastery. Embrace challenges, experiment with diverse patterns, and share your knowledge with fellow crafters to foster a thriving crochet community.
Endless Possibilities
The versatility of granny squares allows for endless possibilities in creating beautiful afghans, cozy blankets, stylish accessories, and captivating décor pieces. Let your imagination run wild as you explore the myriad designs these squares can bring to life.
Crocheting granny squares is not just a craft; it’s an art that enables you to express yourself through vibrant colors, intricate patterns, and handmade warmth. Enjoy every stitch, celebrate your achievements, and relish the joy of creating something unique with your hands.
External Resources:
- Granny Square Inspiration – Ravelry – Explore a vast collection of granny square patterns for inspiration.
- Crochet Forums – Crochetville – Engage with a community of crochet enthusiasts to share experiences and ideas.
Happy Crocheting
As you conclude your crochet session, remember that every granny square tells a story—your story. Cherish each creation and embrace the joy of bringing beauty and warmth into the world, one stitch at a time.

For over a decade, I’ve been Mike, an artist, crafter, and designer deeply immersed in the Croc world. I thrive on crafting unique, size-inclusive patterns, fostering creativity, and sharing them on ktforum.com. My designs aim to ignite your creative spark and delight you, ensuring clarity and ease of use through rigorous testing. Join me in expressing your creative flair and showcasing your craft with joy.
Related Posts
- How to Square Up Quilt Blocks: A Guide for Perfecting Your Project
Quilting is a beautiful craft that melds creativity and precision. Yet, even the most carefully…
- Crocheting a Cozy Baby Blanket: A Step-by-Step Guide
Crocheting a baby blanket is a delightful project, whether you're a seasoned crafter or just…
- Can you wear a pocket square with a dress shirt and jeans
Absolutely. Wearing a pocket square with a dress shirt and jeans can elevate your casual…
- Knitting vs. Crocheting: Unraveling the Differences
Knitting and crocheting are two wonderful crafts that often get tangled together in discussions. While…

